Today’s the day we finally tackle one of the most useful and often overlooked upgrades—adding a water bottle cage to your bike. It’s an easy way to make your ride smoother and stay hydrated on longer routes. I remember when I first started biking seriously, I didn’t realize how often I’d need water on the go. This small upgrade turned out to be a game-changer. With just a wrench and a few minutes, you can install your very own hydration station. Whether you’re a beginner or guiding your kids through a DIY project, this is a perfect gateway into basic bike maintenance.
Putting on a bottle cage may seem daunting at first, but it’s actually fast, fun, and pretty hard to get wrong. Once you’ve turned the first bolt, the rest flows smoothly—no mechanical genius required. This project gives you that satisfying feeling of doing work that improves your ride, and it builds confidence for more fixes later. Just find the mounting holes on your bike frame, grab your wrench, and follow a few steps on how to install bike water bottle holder.
Preparations before installation
What size bike water bottle fits in the water bottle cage?
When I first tried to install a bike water bottle cage, I thought all bottles were the same—turns out, I was wrong. Most standard cages are made to hold a standard-size bottle with a diameter of about 2.875 inches or 73 mm. The usual capacity ranges from 21 to 26 fluid ounces, or roughly 600 ml to 750 ml, which works great for most rides.
But here’s the thing—if you like experimenting like I do, you’ll find bottles in all kinds of shapes: the classic cylindrical, square, even rectangular ones. A non-standard bottle might not fit your existing cage, and that’s where an adjustable-size option really allows more freedom. These cages can handle larger or smaller bottles, giving you flexibility without worrying about whether the bottle will stay put.
Are bike water bottle cages universal?
The quick answer is no—bike bottle cages are not truly universal. While many brands stick to a general sizing, there are plenty of alternative size options out there. Before purchasing, always check the mounting length to ensure it corresponds with your bike’s mount. I’ve worked on some unique bicycles that didn’t even have mounting points, and in those cases, I had to use a non-standard setup—like straps, or even a saddle or seat post adapter—just to get the bottle cage to stay in place.
How do I choose a water bottle cage?
Various water bottle cages fit different bikes. Certain bikes may become incompatible if you select the incorrect bottle cage. The following elements should be taken into account when selecting a bike water bottle cage:

Compatibility
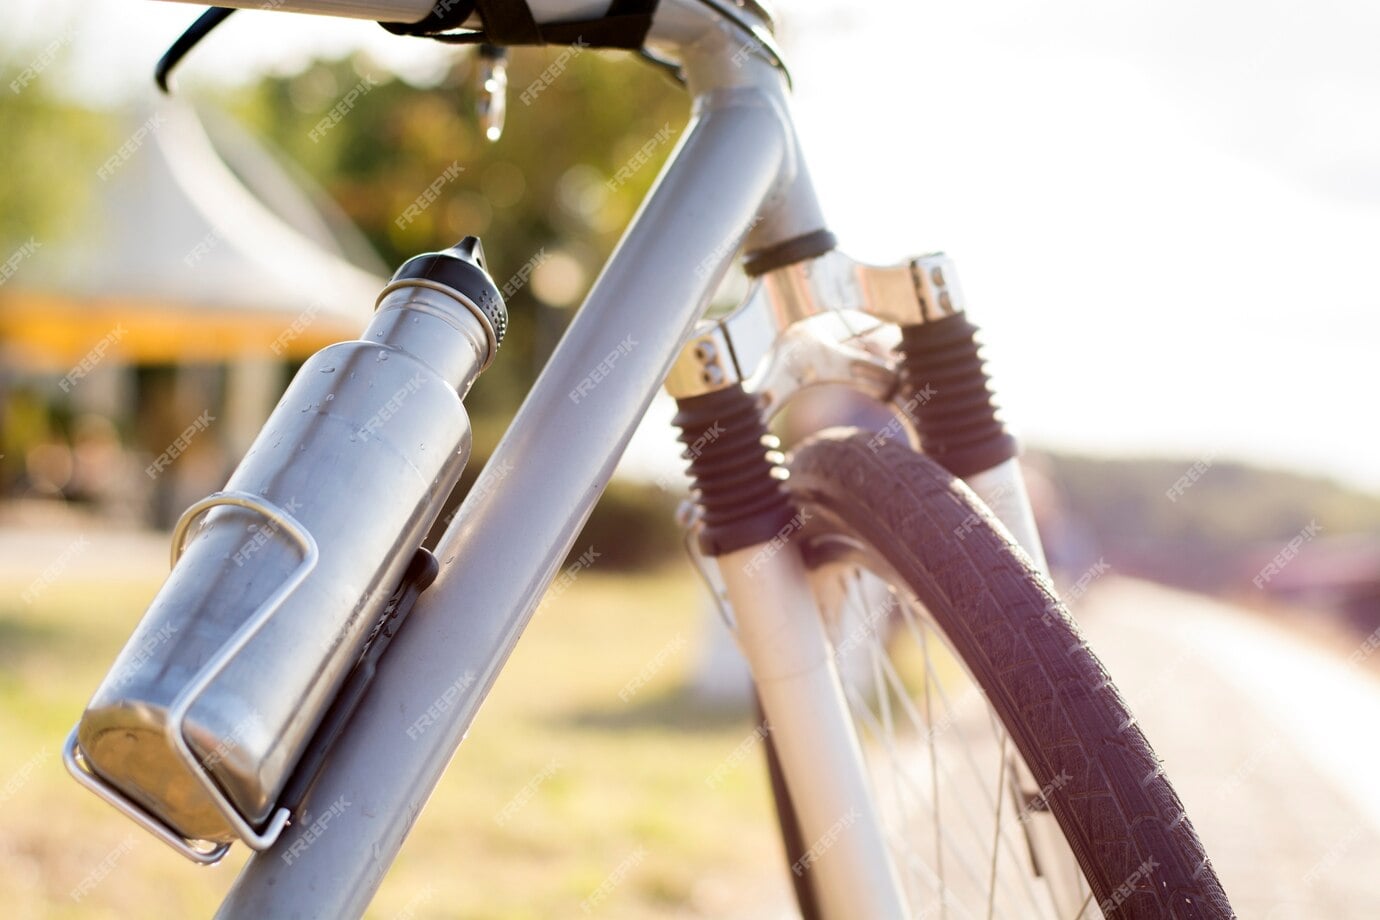
When selecting a water bottle cage, the first thing to consider is compatibility. A standard-size bottle with a diameter of 2.875″ and about 5” tall usually fits most bicycle frames, but some bikes, like downhill models, have little room for bottles and cages, especially if the frame size is smaller or shaped differently. Always make sure your cage will fit before buying. If you want to use an airtag to track your bike, look for a cage that is compatible with an airtag bike mount—a smart idea for city riders or commuters like myself who’ve had to lock their bike in busy areas.
Material
The next thing to consider is the material. I’ve personally used plastic, aluminum, and even carbon fiber bottle cages, and each has its own pros. Plastic is lightweight, comes in different colors and designs, and can easily match your bike style. Aluminum alloys are common on commuter bikes because they’re affordable and reliable. On road bikes, people often go for carbon fiber because it’s super lightweight and looks sleek. If you’re into premium gear, you might even consider titanium, which is both durable and very expensive—not for beginners, but perfect if you want a long-lasting option.
Retention system
The retention system is often overlooked but extremely important. If your bottle falls out during a ride, it might break, damage, or worse—make you or other cyclists fall. I’ve seen it happen on the road, especially at high speed, and it’s a real safety issue. Choose a cage that will hold your bottle securely in place. Most use a wing structure, and the traditional retention method gets the job done well. Still, reasons like a big or small bottle, rough terrain, or even incorrect placement after drinking can cause the bottle to hit the ground—so test the fit before your next long ride.
Related: Are Electric Bikes Street legal?
Bottle entry method
Finally, let’s talk about how you get the bottle in and out. Some cages offer left-side access, others right-side entry, and then there’s the top-entry style. Your left-hand or right-hand preference might not matter on short rides, but it makes a difference when you’re moving fast or carrying gear. I personally prefer right-side access for easier reach, but the best choice depends on your handedness and what feels natural. Whatever you pick, make sure it provides maximum security—because at the end of the day, a stylish cage doesn’t mean much if it can’t hold your water bottle properly.
Weight
When choosing a water bottle cage, one of the key things I look at is weight because it really affects your cycling performance and comfort. A lighter cage makes it easier to climb hills and pick up speed, especially on longer rides. Out of all the materials available, carbon fiber cages are the most lightweight. In fact, the lightest one I’ve seen weighed just 0.283 ounces. If you want to reduce the overall bike weight, pay attention to the cage weight.
Appearance
Selecting a cage that matches your bike is more important than most people think. I once made the mistake of installing a bright yellow cage on my matte black Trek carbon bike, and honestly, it looked pretty weird. The right color and design help the cage blend into your setup and make the bike look more complete.
Budget
Bottle cages come in a wide price range—from just a few dollars to over $100. The aluminum cage ranges from $5.99 to $35, the plastic one from $6.99 to $25, and the carbon type usually falls between $16 and $90. If you’re after premium options, titanium cages range from $50 to $100. Don’t just go for the lowest price if you care about quality. From my experience, mid-priced cages are the most cost-effective—they meet your needs without compromising on product quality.
Where to install water bottle cage on bike ?
You can install your bottle cage in at least six different places. The bottle cage can be installed on the top tube, down tube, saddle, seat post, or bar.
The following elements can be taken into account while selecting a location:
Related: Connecticut ebike Laws Simplified
Ease of use
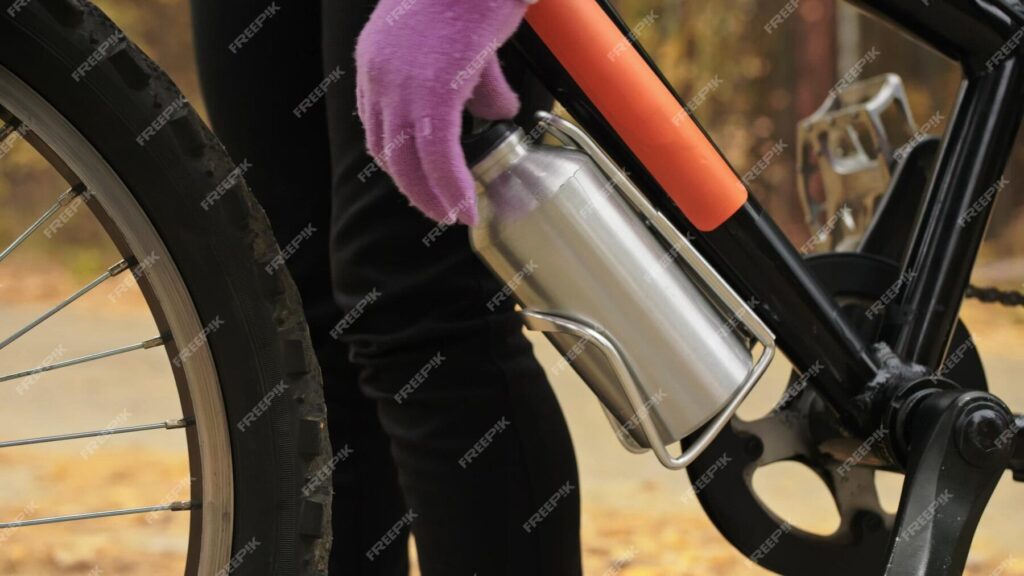
A bottle cage is most frequently mounted on the downtube, directly behind the front tire. This position gives easy access to your water bottles while you’re riding, keeping hydration close and convenient. Some riders prefer installing their cage on the seatpost frame tube, which can feel even easier to reach depending on your bike setup. The majority of bikes have mounts in these middle frame locations, and if your cycle permits it, mounting in both positions is frequently beneficial for longer rides.
Frame design
Your bike’s frame design will also influence where and how you can mount the cage. While some frames have specific mounting places, others do not. In these situations, you might need to use a strap to hold it in place or use a different kind of holder. For example, full-suspension mountain bikes usually have a limited area for a bicycle water bottle cage, making it hard to use standard mounts. In that case, I suggest trying a hydration system like a Camelbak, especially if you ride on rugged trails.
Personal needs
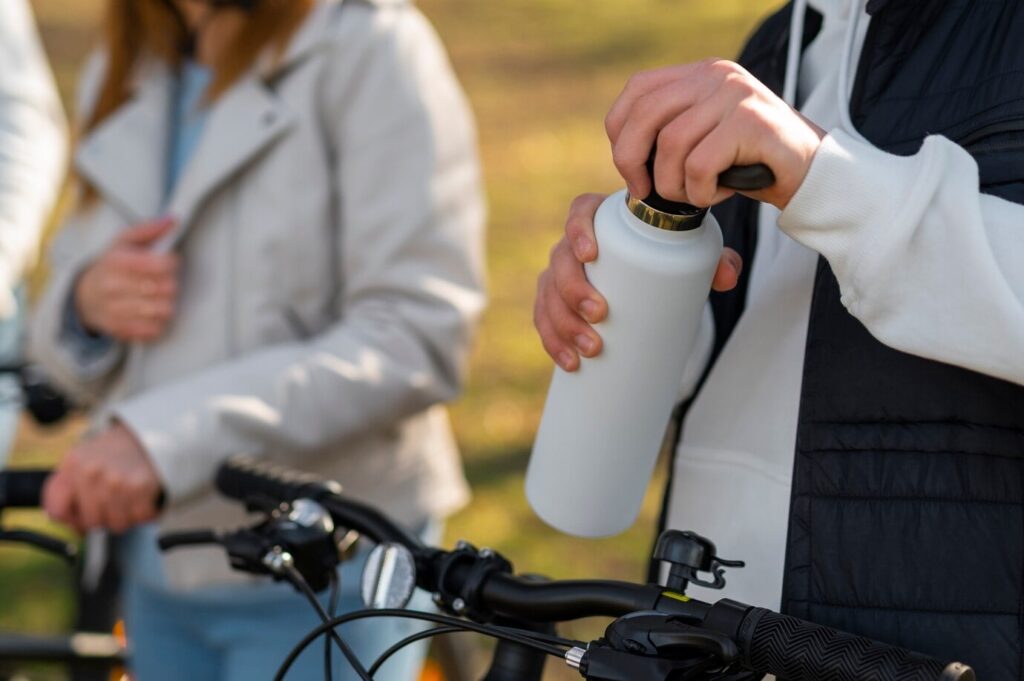
Your setup depends on your routine. If you ride only short distances, it’s sufficient to just install one bottle cage, and you can install it wherever feels comfortable. For long-distance riders like me, having many cages is important to stay hydrated. No matter the number, always mount the cage firmly to allow smooth insertion and removal of bottles.
A bottle that spills while riding can be unsafe and could harm the bike, the bottle, or even other riders. Also, check the cage from time to time to make sure it hasn’t come loose. Once you’ve finished selecting the right position, the next step is to gather your tools and begin the installation process.
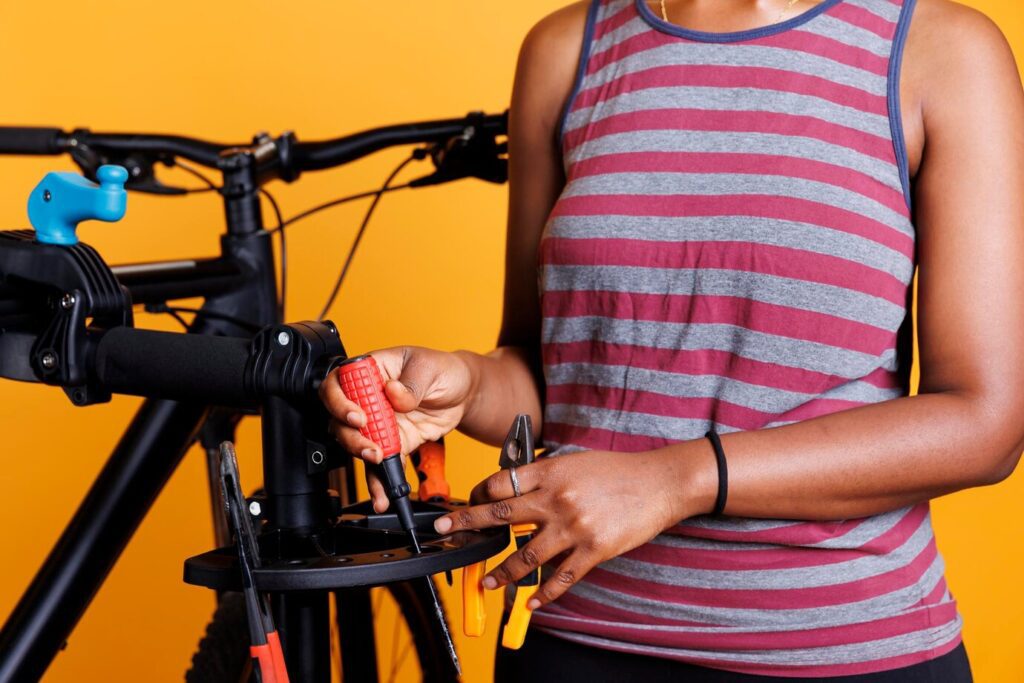
Tools and materials for installation
4 mm Allen Key Wrench – perfect for tightening bolts.
2 x 5mm x 12mm bolts – each cage typically has two bolts to fix it to the frame.
2 x Washers – use one washer per bolt to keep things snug.
One water bottle cage – the main item for mounting.
Straps (optional) – helpful if your bike doesn’t have bolt holes.
Seat post adapter (optional) – a good fix if you want to mount behind the seat.
Saddle mount (optional) – an alternative spot to attach your cage if you ride long-distance.
Related: Tennessee Ebike Laws Simplified
A step-by-step guide on how to install bike water bottle holder
Step 1: Choose the place you want to install it:
First, choose the right place on your frame to install the bottle cage—most standard bikes have screws on the top tube, down tube, or seat tube. Use a 4 mm wrench to remove any existing screws.
Step 2: Check compatibility:
Check the compatibility of your cage, water bottle, and bike frame. Make sure there’s enough room for smooth access and fit.
Step 3: Install washers:
Slide a washer onto each bolt—one washer for each bolt—before inserting them. Most setups use two washers.
Step 4: Install screws:
With your fingers, turn the 5mm bolts into place and then tighten using a 4 mm Allen key. Be careful not to overtighten, as it can damage the frame.
Step 5: Check whether it is installed firmly:
Give the cage a gentle shake with your hand to ensure it’s mounted securely and doesn’t wiggle.
Step 6: Put the bottle on and check if it is secure:
After placing your bottle inside the cage, shake it once more. To keep it safe and stop it from falling out, you might need to alter the bottle cage or swap it out with a bigger or smaller bottle if it seems loose.
Related: Alaska Ebike Laws Simplified
How do you install a water bottle cage on a bike without holes?
Bicycle bags and other accessories are frequently placed on the frame. Therefore, a water bottle cage is not allowed. In this situation, you could use the alternatives listed below.
Water bottle cage with straps
If your bike frame doesn’t have built-in holes, you can use a water bottle cage with straps. These don’t rely on fixed mounting designs and are easy to attach to the handlebar or frame without any tools. The majority of these are movable and suitable for bottles of various sizes. To keep the bottle and cage securely fastened, just make sure the straps have sturdy velcro.
Bottle cage adapter
A clamp and two to four screw holes are included with a bottle cage adaptor. You can clamp it onto the seatpost or handlebar, and its screw holes match those on a regular bike frame. Just align it properly to the right location and install the bottle cage like you would on a normal mount.
Saddle cage mount
Another option is the saddle cage mount, which you mount on the trail of the saddle. Each side of this mount has two screw holes, similar to standard frame mounts. You can install up to two cages using one saddle mount, making it a great choice for long rides or extra hydration.
Related: North Dakota Ebike Laws
Conclusion
Mounting a water bottle cage is a simple process, but the most difficult part can be ensuring you pick the right size, style, and design that suits your needs. If you drink a lot on long rides, it’s smart to install two bottle cages for extra hydration. The market is full of abundant options, from different styles and colors to practical solutions that match your riding preferences.
Finding the perfect option is often just a click away. Once you’re ready, just start exploring the outdoors on your bike—and remember, it’s all about staying hydrated and having fun on the trails.
Related: South Dakota Ebike Laws