How to Flush Brake Fluid: Avoid Common Mistakes

Sharing is Caring

how to flush brake fluid

Brake fluid plays an integral role in your bike’s braking system, ensuring that everything functions smoothly. Over time, the fluid efficiency can decrease, causing the braking process to become more complicated and less accurate. This can be dangerous, especially in emergency situations when you need quick and reliable stopping power. 

Neglecting regular maintenance of your brakes can lead to soft and spongy brakes, which result in longer stopping distances and brake failure in extreme cases, particularly during hard stops.

 It’s important to know how to flush brake fluid to ensure optimal performance and keep you safe on the road by maintaining the system’s reliability. Flushing your brake fluid regularly helps prevent these issues and ensures that your braking system is always functioning at its best.

4 GOOD REASONS TO BLEED MOTORCYCLES BRAKES

  • More efficient braking ensures that your bike’s brakes work at their best, improving performance and response.
  • Precise braking allows you to have better control, especially when making sudden stops or navigating tight corners.
  • Preserve the health of your braking system by keeping it clean and maintained, preventing premature wear or damage.
  • It directly impacts your safety, as fresh brake fluid ensures optimal braking power when you need it most.

When to change bike fluid

If you notice a change in your braking performance, it might be time to replace the brake fluid. Over time, the quality and efficiency of the fluid decreases, which can make braking more difficult. You may feel bumps or notice that the lever or brake pedal feels spongy. It’s recommended to purge and replace the fluid every year, regardless of the number of kilometers you’ve ridden. If you’re unsure, a sudden loss of performance is usually a sign that your brake fluid needs attention to keep your bike safe and responsive.

Necessary equipment

That’s what you require:

List of products:

  • Brake fluid: Brake dot 4, Brake dot 5.1, and X-trem Brake Fluid for competition motorcycles, all chosen according to the manufacturer’s recommendations for your bike.
  • The environmental mat: Used to protect all floors from liquid stains during the brake fluid change process.
  • Brake Cleaner: This product degreases brakes and all mechanical parts, ensuring a clean and smooth brake system.


Other accessories needed:

    • A brake bleeding kit is essential for flushing the brake fluid properly and efficiently.
    • Cloths will be needed to protect your bike from any potential spills or stains during the process.
    • A toolbox containing a Phillips screwdriver and a combination wrench will help you remove any parts or screws easily.
    • A pair of surgical gloves is crucial to keep your hands safe from brake fluid and other contaminants while working on your bike.

1. Place your bike

how to flush brake fluid

Place your bike upright on the stand, ensuring stability. Next, lay a cloth over the fairings beneath the reservoir to prevent the motorcycle from corrosive fluid.

2. Drain the old liquid

  • Use an adapted screwdriver to open the master cylinder reservoir without damaging the screws.
  • Remove the cap and washer; if the washer is damaged, replace it, or simply clean it with a cloth if it’s still in good condition.
  • On the brake caliper side, take off the rubber cap covering the bleeder screw.
  • Attach the combination wrench with the boxed end to the bleed screw.
  • Connect the bleeding kit to an air compressor and position the transparent tube on the screw to empty the reservoir and braking circuit.
  • Slightly loosen the bleed screw and activate the bleeding kit to handle the task automatically.
  • Once the reservoir is empty, clean it thoroughly with a clean cloth.
how to flush brake fluid

3. Add new brake fluid

how to flush brake fluid

Once you have finished draining the old fluid, fill the reservoir with new brake fluid. Begin the process by using a vacuum to draw out the remaining fluid until you see clear liquid in the tube near the bleed screw. Perform suction one last time before tightening the bleed screw. 

Next, do a manual purge by pressing the brake pedal (or brake lever for the front brake) around ten times. Make sure to maintain pressure on the pedal (or lever) while slowly loosening the screw with the wrench, but never release pressure during the process. It’s important to tighten the screw before releasing pressure to prevent air from being sucked into the system.

Afterward, top up the brake fluid level in the reservoir and close it securely. Don’t forget to check the tightening of the bleed screw, remove the transparent tube, and replace the rubber cap. 

If you started with the front brake, move on to the rear, and test the feeling of the brake lever or pedal on a static bike—it should feel firm. Lastly, clean any excess fluid with brake cleaner to ensure everything is neat and functioning properly.

how to flush brake fluid

TIP

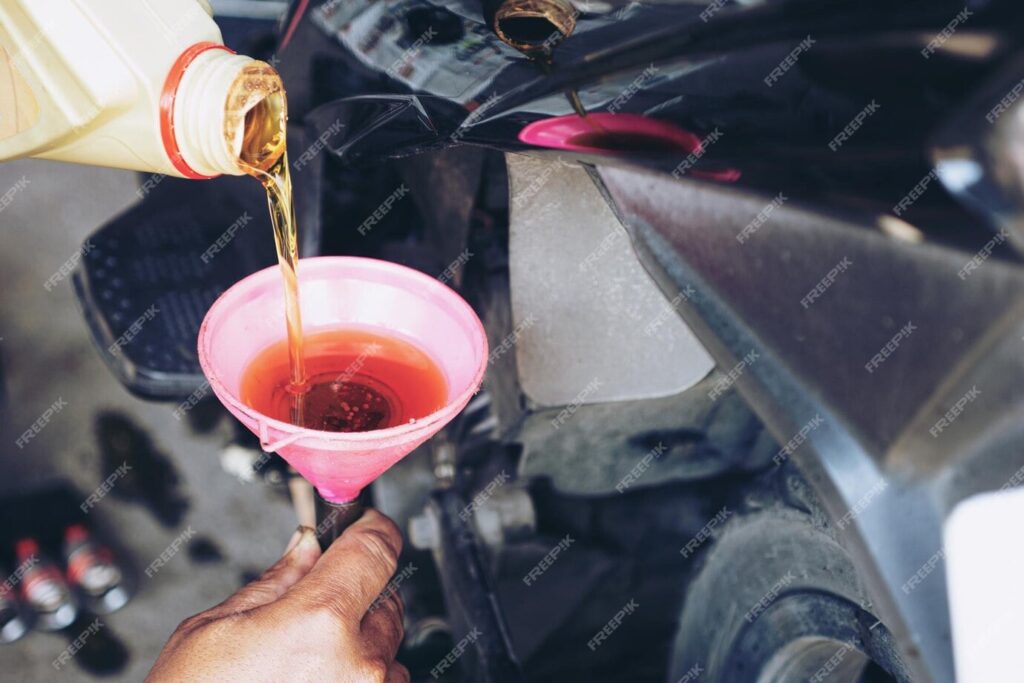
As you apply the brakes, the fluid level in the reservoir drops, so be sure to monitor it frequently and top it up as needed. If the reservoir runs too low and air enters the braking system, you will need to start the bleeding process over again.

Recent Posts:

Also read

About Us

I love motorcycles, bikes, and dirt bikes. There’s something exhilarating about the roar of the engine and the sense of freedom that comes with cruising the open road. Whether it’s the sleek design of a sports bike, the ruggedness of a dirt bike tearing through the trails, or the classic allure of a vintage motorcycle, every ride offers a unique experience. The adrenaline rush from leaning into curves or tackling off-road terrain is unparalleled. Riding is more than just a hobby for me. It is a passion that strengthens my soul and brings me immense joy